
"Embroidery is the art of distortion"
From the earliest
ages, man has been sewing thread on garmets for decorations and identity. However,
it was not until the 1800's that the needle hook method of machine sewing was invented,
and to this day the same basic process is still used. The only real difference is
now we have 21st century computer controlled machines that can do in a few minutes
that use to take days, weeks, or years to perform. Here is how the process works,
from the initial design on paper to finished embroidery on your shirt.
Double click on a picture to enlarge
|
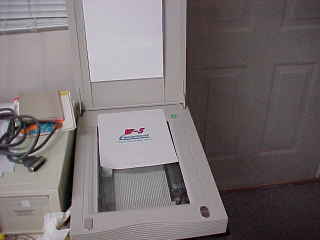
Step 1 The artwork of the design is scanned into the computer as a graphics file. pcx,jpg,bmp, etc. |
|
|
Step 2 The process of creating an embroidery tape is called DIGITIZING. |

|
|
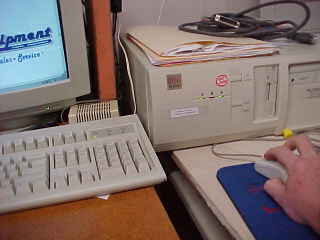
Step 3 The graphics file is imported into a Digitizing Software program and the process begins. |

|
|
Step 4 The computer "mouse" is used to imput sewing needle points for the design |
|
|
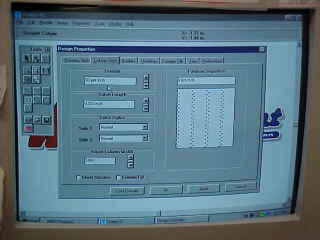
Step 5 Every aspect of the design is created: Sewing direction, type of stitch, density, underlay special effects, etc. |
|
|
Step 6 Because embroidery is 3-dimensional, it is considered an "artform," not a science. Only after many years of practice can a true digitizer master the art of laying theads to create a beautiful embroidered design. |
|
|
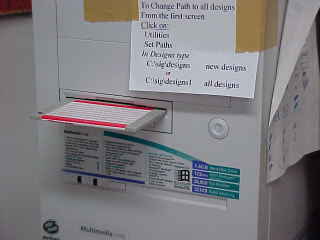
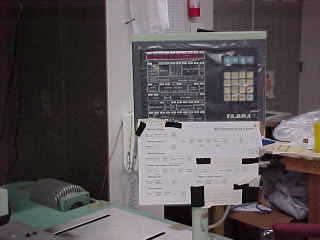
Step 7 After the design has been digitized, it is imported into Embroidery Machine Software for downloading into the Embroidery Machine. Some machines have a disc drive that can take the disc directly. |
|
|
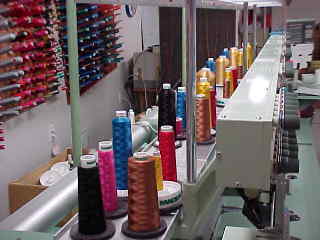
Step 8 The embroidery machine operator places the correct color thread spools which the design calls for on the machine. |
|
|
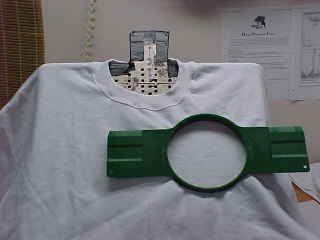
Step 9 The "hooper" takes the embroidery hoop and places it on the hooping table. Hoops come in many sizes and shapes. |

|
|
Step 10 "Backing" is placed on the hoop, the shirt is placed over the hooper, and the top hoop is pressed into the lower hoop, pinching the shirt and the backing together tightly. |
|
|
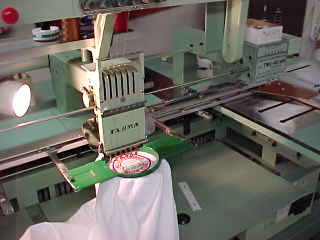
Step 11 The shirt is placed on the machine with the hoop securly locking into place. |
|
|
Step 12 Sewing data is imput into the machine: Design number, needle sewing sequence, speed, design placement, design orientation. |
|
|
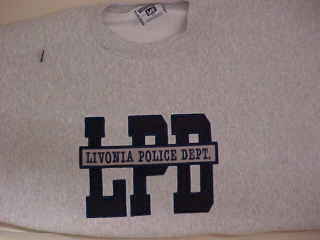
Step 13 The operator then starts the machine. After a few minutes, or hours depending upon the size of the design ---- PRESTO! |

|
|
Step 14 After the design is completed, the backing is trimmed from around the design, small threads are trimmed, and the completed shirt is "bagged & tagged" for shippment. |
|
|
Home |
Form |
![]()


